Patches are more than just decorative elements on backpacks; they tell stories, showcase interests, and add a personalized touch to your gear. Whether you’re an outdoor enthusiast seeking to identify your gear or a student wanting to express your style, knowing how to properly attach patches is essential. With the right technique, you can ensure they stay secure through any adventure. This guide will walk you through the best practices for sticking patches on your backpack, offering pro tips that will help you achieve professional results. So, let’s explore the methods to enhance your backpack while ensuring that your patches look great and last long!
Selecting the Right Patches for Your Backpack
is essential to not only express your unique style but also to ensure durability and functionality. When browsing available patches, consider your backpack’s material, intended use, and the type of patches that will best fit your needs. Look for patches made from high-quality fabrics like cotton or polyester, which offer a good combination of durability and design versatility.
A crucial aspect to consider is the style of the patch. Embroidered patches generally feature intricate designs and can add a textured element to your backpack. They are often preferable for decorative purposes. On the other hand, vinyl or PVC patches usually provide a more modern look with waterproof qualities, making them suitable for outdoor adventures. Assess whether you prefer a patch that can easily be ironed on or one that requires sewing for added security; this choice will impact how adaptable the patch is to various conditions and activities.
Before making your selection, think about the message or theme you want to project. Whether you’re leaning towards fun and whimsical designs for a child’s backpack or more minimalist and sleek options for an adult, matching the patch to the personality and function of the backpack is essential. Lastly, ensure that the size of the patch complements your backpack without overwhelming it-consider using a mix of larger statement patches alongside smaller ones for a layered effect.
Types of Materials Used for Patches

Different materials play a crucial role in the functionality and aesthetics of patches, especially when adorning backpacks. Selecting the right material is essential not only for style but also for durability and the specific needs of your activities. Knowing the options available can help you make informed decisions that complement your design choices and ensure longevity in outdoor conditions.
Common Patch Materials
- Cotton: This is a popular choice for embroidered patches due to its softness and versatility. Cotton patches are often breathable and comfortable against the fabric of your backpack, making them a great option for casual use.
- Polyester: Known for its strength and resilience, polyester is a fantastic choice for patches intended for rugged outdoor activities. Its water-resistant properties also make it ideal for environments where moisture is a concern.
- Felt: Often used as a base for embroidered patches, felt provides a unique texture and can be easily cut into various shapes. However, it may not be as durable as other materials if exposed to harsh conditions.
- Vinyl and PVC: These synthetic materials are excellent for modern, sleek designs and offer waterproof qualities. They are particularly useful for patches that need to withstand the elements, especially if you’re planning to take your backpack on hiking or camping trips.
- Silk: Though less common, silk patches have a luxurious feel and can feature vibrant colors and intricate designs. Choose silk for a more fashion-forward look but keep in mind that it may not endure outdoor wear as well as sturdier fabrics.
When selecting patches, consider the intended use of your backpack. If you’re heading out on an adventure that involves rain or dirt, choose materials like polyester or vinyl for maximum durability. On the other hand, for a day at school or casual outings, cotton or felt patches may suffice for their aesthetic appeal. Whatever your choice, understanding the characteristics of each material will enable you to personalize your backpack while ensuring your patches stay securely attached through all your endeavors.
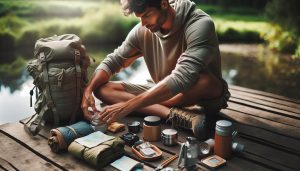
Essential Tools for Attaching Patches
To showcase your style and personality on your backpack, selecting the right tools for attaching patches is essential. With a variety of methods available, knowing what you’ll need can drastically improve your results and longevity of the patches. Whether you’re a beginner or an experienced patch enthusiast, having the right tools on hand makes all the difference when it comes to achieving a polished look.
For iron-on patches, a good iron is your best ally. Look for one that allows temperature control, as different fabrics may require different heat settings. Along with the iron, you will need a flat surface and a pressing cloth – a piece of cotton fabric that can be placed over the patch to protect both the patch and your backpack from direct heat damage. If sewing the patches is your preferred method, a sturdy needle and strong thread are crucial. Opt for thread that matches the color of your patch or backpack, as it helps to create a seamless finish. Additionally, a thimble can protect your fingers while you push the needle through thick materials.
Suggested Tools
- Iron: For applying iron-on patches efficiently.
- Pressing cloth: Protects both the patch and backpack.
- Needle: A sharp, sturdy one for sewing patches.
- Strong thread: Choose a color that matches.
- Scissors: For trimming loose threads.
- Thimble: Protects your fingers during sewing.
- Fabric glue: An alternative for additional adhesion.
Another useful tool is fabric glue or adhesive, which can provide extra reinforcement for patches that are under more strain. This option can be especially beneficial for patches that might be exposed to repeated wear, such as those on outdoor or travel backpacks. If you want to add a more personalized touch, consider using decorative pins, which can complement patches and offer flexibility for changing styles.
No matter your attachment choice, having these essential tools will empower you to securely fasten your patches, allowing you to express your individuality with ease. With the right preparation and approach, your backpack can become a canvas for your creativity and a testament to your adventures.
Step-by-Step Guide to Ironing Patches

Getting your patch firmly attached to your backpack might seem intimidating at first, but the ironing method is one of the easiest and most effective techniques to master. First, ensure your backpack is clean and free of any dirt or debris that could interfere with adhesion. Place the patch on your desired location and take a moment to admire your design before you start the process. The visually striking images can add a personal touch to your gear, turning an ordinary backpack into a canvas showcasing your unique style.
Step-by-Step Ironing Process
- Prepare Your Tools: Gather your iron, a flat surface, and a pressing cloth. Ensure the iron is clean and set it to the appropriate temperature for the fabric of your backpack, typically medium heat works best for most materials.
- Position the Patch: Lay your backpack flat and place the patch where you want it. If your patch has a clear adhesive backing, you can gently press it to stick it in place temporarily.
- Cover with Pressing Cloth: Place the pressing cloth over the patch. This protects both the patch and the fabric from direct heat, preventing scorching or melting.
- Ironing Technique: Firmly press the iron down on the patch through the pressing cloth without sliding it. Hold for about 30 seconds to a minute, depending on the patch’s thickness and the fabric of your backpack. Make sure to apply even pressure across the entire patch for consistent adhesion.
- Cool Down: After the time is up, lift the iron and let the patch cool for a few moments while still covered. This cooling period can enhance the bond as it sets.
- Check the Adhesion: Once cooled, carefully peel back the pressing cloth and check if all edges of the patch are securely adhered. If any area is lifting, repeat the ironing steps as needed.
Final Touches
If you want extra assurance that your patch will stay put, consider reinforcing it with a few stitches around the edges after ironing. This not only secures the patch but also adds a decorative touch to your backpack. Keep in mind that while ironing is an easy option, it’s essential to follow the manufacturer’s instructions for your specific patch and backpack material. With these steps, you can confidently add patches to your backpack, showcasing your personality and interests like a pro!
Sewing vs. Ironing: Which is Best?

Deciding between sewing and ironing patches onto your backpack can feel overwhelming, especially if you’re new to customizing your gear. Both methods have unique advantages and challenges, making it essential to choose the one that suits your style and needs. Ironing patches can be the quickest option, offering a fast solution with minimal mess and a clean finish. Simply position the patch, cover it with a pressing cloth, and apply heat. In just a few moments, your patch is secured, providing an easy way to personalize your backpack without needing extensive crafting skills.
However, sewing offers benefits that ironing simply can’t compete with. One of the standout advantages is durability. Stitched patches can withstand more wear and tear, especially if you’re frequently using your backpack for outdoor activities. If you’re embarking on a hiking adventure or a road trip, the extra security that sewing provides ensures your patches remain intact, even in tough conditions. Moreover, hand-sewn patches reflect a level of craftsmanship and personal touch that heat-activated adhesives can lack. It’s an opportunity to showcase your skills and even weave in some colorful threads around the edges for added flair.
When considering which method to employ, think about your intended use and the look you want to achieve. If you’re looking for something quick, easy, and sleek, ironing is your best bet. But if you want a robust attachment that can handle the rigors of daily use, sewing is the clear winner. In some cases, combining both methods could be the optimal solution. Iron on the patch for immediate adhesion, then sew around the edges for extra durability, creating a beautiful blend of convenience and craftsmanship that keeps your adventures stylishly marked. Regardless of your choice, both methods can transform your backpack into a unique statement piece that reflects your personality.
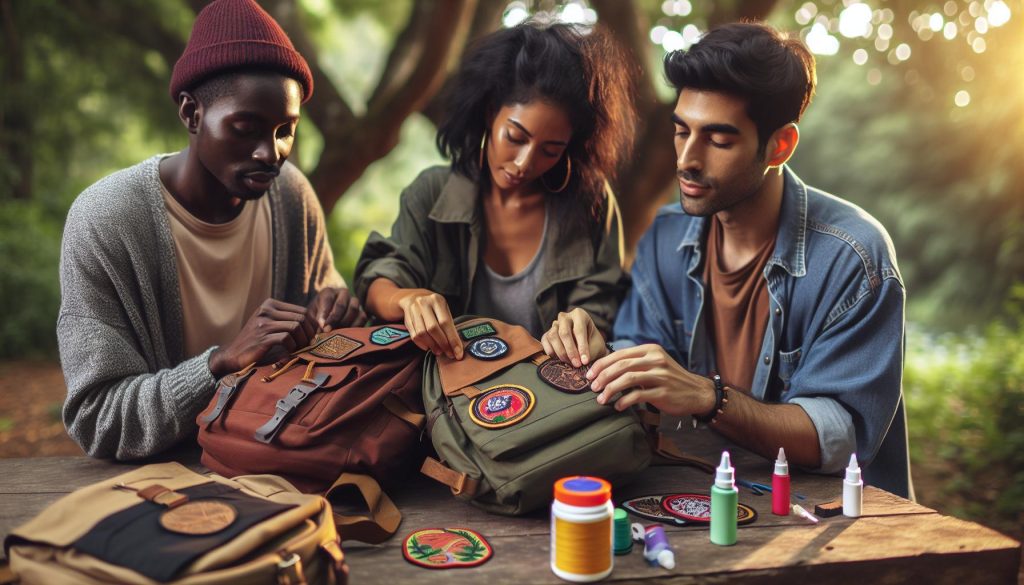
Creative Placement Ideas for Patches
When it comes to adorning your backpack with patches, the magic often lies in the placement. Just like a well-placed accessory can elevate an outfit, the strategic positioning of patches can transform a plain backpack into an eye-catching expression of your personality and interests. Before you start sticking or sewing, think about how you want your backpack to make a statement and where patches can best achieve that.
Consider placing larger patches on the central body of your backpack. This area is prime real estate for bold designs that capture attention. For example, a mountainous or nature-themed patch is perfect for a hiking backpack, symbolizing your love for the great outdoors. Smaller patches can be scattered around this central piece or placed on secondary locations like the front pocket or shoulder straps, adding a playful touch that draws the eye and creates a cohesive look. The asymmetrical placement can be particularly striking, as it invites curiosity and draws viewers in.
Layering Ideas
To add depth and interest to your patchwork, try layering different shapes and sizes. A series of circular patches can offset a rectangular one, creating a dynamic visual effect. You might also want to mix and match fabric types; for instance, pairing an embroidered patch with a rubber PVC patch can enhance texture and tactile interest. Once you have your placements in mind, temporarily pin or basting the patches to visualize their arrangement before securing them. This approach minimizes the risk of placement regret and ensures your design flows well.
Personal Touches
Incorporating personal memories into your patch design can make your backpack uniquely yours. If you’ve traveled to a specific city or attended a festival, look for patches that represent those experiences and place them prominently. Patches from local artisans or cultural events not only offer a personal touch but also serve as great conversation starters. If you’re an artist or have friends who are, consider creating custom patches with unique designs that reflect your journeys and interests-an artistic touch that tells your story through fabric.
No matter how you choose to place your patches, remember that the best designs reflect your style and passions. By thoughtfully considering their placement and personal significance, you can transform your backpack into a canvas that tells your story every time you wear it.
How to Ensure Patches Stay Secure
To keep your patches firmly secured on your backpack, a little foresight and the right techniques can make all the difference. Proper attachment methods not only enhance the aesthetic appeal of your backpack but also ensure that your patches endure the rigors of daily use, whether you’re trekking through nature or commuting in the city.
A crucial factor in achieving lasting adhesion is selecting the right type of patch for your backpack’s material. For fabric backpacks, iron-on patches can be particularly effective. To apply these, heat your iron to the recommended temperature (usually medium), place a thin cloth over the patch, and press down for the specified time. Always double-check the manufacturer’s instructions for best results. Additionally, for high-stress areas or if you’re looking for extra security, consider pairing the iron-on method with a few hand stitches around the edges. This combination ensures that your patches remain firmly attached, even with heavy use.
Reinforcing Secure Attachment
After applying patches, keep an eye on their condition during routine maintenance. If you notice any corners starting to lift, add a few drops of fabric glue to those areas for extra stability. For patches that may take a lot of wear and tear-like those on the bottom of your backpack-use heavier stitches to reinforce the edges. As an additional step, seal the edges with a clear fabric protector or waterproofing spray. This not only reinforces adhesion but also helps to keep dirt and moisture at bay, ensuring the longevity of your patches.
By following these strategies, you’ll enhance the durability of your patches and maintain the originality and style of your backpack as you carry it around in various environments. Taking preventative measures will save you time and frustration in the long run and keep your backpack looking fresh and personalized.
Troubleshooting Common Patch Problems
Common issues with patch application can be frustrating, but addressing these problems early can ensure your patches remain securely affixed to your backpack. One common problem is patch corners lifting or peeling. This can happen due to inadequate heat application or insufficient adhesive strength. If you notice corners starting to lift, promptly using a few drops of fabric glue can help re-secure these areas. Additionally, applying a moderate amount of pressure while heating will enhance adhesion and longevity.
Another typical issue is the patch bubbling, which can occur if the patch is applied too quickly or at too high a temperature. To remedy this, ensure your iron is set to the appropriate heat setting and keep it moving while applying pressure to avoid scorching the fabric. If you find that bubbling has already occurred, you can carefully cut small slits in the affected area to allow trapped air to escape, then reapply heat while pressing down firmly.
Finally, inconsistency in patch adherence can arise from using different fabrics and materials. Synthetic backpacks often require a different approach than cotton or canvas packs due to their varying texture and heat sensitivity. Always check the patch’s material compatibility with your backpack’s fabric. If you experience multiple patches failing to stick, consider creating a test patch on a less visible area first to assess the effectiveness of your chosen method.
By understanding these common patch problems and implementing effective solutions, you can preserve the integrity of your patches and enjoy a personalized backpack that stands up to everyday wear and tear.
Maintaining Patches on Your Backpack
Maintaining the patches on your backpack is crucial for keeping both the patches and the backpack looking their best. Proper care can not only extend the life of your patches but also enhance the overall appearance of your gear, allowing you to express your style without compromising on durability. Regular maintenance includes routine inspections, mindful washing techniques, and gentle handling.
To begin, establish a habit of routinely checking your patches for signs of wear or damage. Look for any lifting edges, discoloration, or loose threads. If you notice any of these issues, address them promptly. For lifted patches, a few drops of fabric glue can help secure the edges back in place, while loose threads can be carefully cut or tucked without compromising the patch’s structure.
When it comes to cleaning your backpack, consider the following tips to keep your patches in top shape:
- Hand Wash: Instead of machine washing, opt for hand washing your backpack to avoid intense agitation that may loosen patches. Use mild soap and lukewarm water, and gently scrub with a soft cloth.
- Avoid Soaking: Don’t soak your backpack too long, especially if it has patches, as prolonged exposure to wet conditions can weaken adhesives.
- Air Dry: After washing, let your backpack air dry rather than using a dryer; high heat can cause patches to warp or peel away.
Lastly, if you plan on using your backpack in harsh conditions, like hiking or camping, consider reinforcing the patches with stitching around the edges. This additional step can help them withstand more wear and tear during your adventures. By incorporating these maintenance practices into your routine, your patches and backpack can maintain their style and integrity, allowing you to carry your gear confidently wherever you go.
Personalizing Your Backpack with Patches
Adding patches to your backpack is a fantastic way to express your personal style while also honoring interests, experiences, or affiliations. This simple customization can transform a plain bag into a statement piece that reflects your personality and adventures. Whether you’re showcasing your favorite band, commemorating a memorable trip, or simply adding a pop of color, the patches you choose can tell your unique story.
When personalizing your backpack, consider the message you want to convey. Patches come in various styles-from vintage to modern, minimalist to intricate designs. You might opt for recognizable logos, fun graphics, or unique embroidered art that resonates with your interests. Remember, the placement of these patches is just as crucial as their design. Thoughtfully placed patches can create a cohesive and eye-catching look. Try clustering them on one side for an eclectic feel or space them evenly for a more balanced design.
Experimenting with patch arrangements can also enhance the visual impact of your backpack. Lay out patches on a flat surface before attaching them; this allows you to rearrange them easily until you find the perfect configuration. Use clear tape to test positions without commitment. Once you’re satisfied, you can secure them through sewing or ironing. For a personal touch, consider adding some DIY elements by combining patches with other embellishments, like pins or charms, to create a layered effect that is entirely your own.
Lastly, ensure your chosen patches are attached securely for longevity. This not only preserves your investment but also keeps your backpack looking fresh and well-maintained during your travels. By selecting meaningful patches and placing them creatively, you’ll have an eye-catching, personalized backpack that narrates your adventure tales everywhere you go.
Upcycling and DIY Patch Ideas
Upcycling is not only environmentally friendly but also a creative way to breathe new life into your favorite backpack. By repurposing old clothing, accessories, or household items into patches, you can add a personal touch that reflects your style and values. For instance, old denim jeans can be cut into patches that evoke a nostalgic vibe, or vibrant fabric scraps can be stitched together to create unique designs. This not only minimizes waste but also allows you to utilize materials that hold sentimental value, making your backpack truly one-of-a-kind.
When considering DIY patch ideas, think beyond traditional fabrics. You can explore materials such as felt, leather, or even canvas from unused bags or curtains. Simple shapes like hearts, stars, or even letters can be easily crafted and attached to your backpack, offering a playful look. If you’re handy with a sewing machine, try creating textured patches by combining different fabrics or adding embellishments like beads or sequins for a standout piece. The possibilities are endless, limited only by your imagination and resources.
For those who love a challenge, consider dyeing and painting your patches. Using fabric dye or paints designed for textile use, you can turn plain patches into vibrant works of art that pop against your backpack’s fabric. Additionally, incorporating stencils or templates can help you achieve precise designs, making it easier to replicate your favorite patterns across multiple patches. This method allows you to tailor colors and designs specifically to what will look best with your backpack, creating cohesion in your overall aesthetic.
Finally, consider engaging your friends or family in your upcycling project. Host a patch-making party where everyone can create their patches or exchange materials. This social aspect not only makes the process more enjoyable but also fosters a sense of community centered around creativity. Each finished patch becomes a conversation starter, enriching your backpack’s backstory while showcasing collaborative artistry. By integrating such personal touches, your backpack will not only stand out but also serve as a canvas for memories and shared experiences.
Caring for Your Patches and Backpack
is essential for prolonging their lifespan and maintaining their aesthetic appeal. With proper maintenance, your patches can remain vibrant and securely attached, enhancing the overall look of your backpack while also expressing your personality. Whether you opt for store-bought patches or DIY creations, regular care can make a significant difference.
To begin with, always follow specific care instructions for both your patches and the material of your backpack. For instance, if you’ve used iron-on patches, avoid high heat settings when laundering your backpack, as excessive heat can cause the patches to peel or melt. Instead, consider gentle cycle washing in cold water. For sewn-on patches, inspect the stitching regularly and repair any loose threads promptly to prevent further damage. If you notice fading or dirt on your patches, gently spot clean them with a damp cloth and mild detergent. This not only preserves the design but also gives your backpack a refreshed look.
Storage also plays a crucial role. When not in use, store your backpack in a cool, dry place away from direct sunlight to prevent fading from UV exposure. For backpacks made of leather or other sensitive materials, consider using protective sprays that help repel dirt and water. Ensure that your patches are not pressed against rough surfaces, which can lead to fraying and damage over time.
Lastly, personalizing your care routine to match your lifestyle can go a long way. For outdoor enthusiasts who use backpacks frequently, consider waterproofing them regularly. If your patches are primarily decorative, think about using a fabric protector spray. This will help shield your patches from everyday wear and tear, allowing them to remain a focal point of your backpack for longer. By developing a mindful care approach, you’ll ensure that your backpack and patches not only withstand the rigors of daily use but also continue to tell your unique story with every interaction.
Faq
Q: How do I choose the right adhesive for fabric patches on my backpack?
A: Selecting the right adhesive is vital. For fabric patches, fabric glue or heat-activated adhesives are best. Ensure the glue is washable and durable. Always read the product instructions for compatibility with your backpack material. Check our section on “Essential Tools for Attaching Patches” for more details.
Q: Can I use a regular iron for applying patches?
A: Yes, a regular iron can be used, but you must adjust the heat setting according to your patch material. Always place a cloth between the iron and the patch to prevent damage. Refer to the “Step-by-Step Guide to Ironing Patches” for comprehensive instructions.
Q: How can I prevent my patches from peeling off?
A: To prevent peeling, thoroughly clean the backpack surface before application. Ensure the adhesive is suitable and apply pressure evenly when attaching the patch. For more tips, see our section on “How to Ensure Patches Stay Secure.”
Q: What should I do if my patch starts to fray?
A: If your patch frays, you can apply a fabric sealant around the edges to prevent further damage. It’s best to address this promptly to maintain the patch’s appearance. For maintenance tips, check our article on “Maintaining Patches on Your Backpack.”
Q: Are there specific types of patches that work best on different materials?
A: Yes, some patches are designed for specific materials. For instance, woven patches are ideal for tougher fabrics like canvas, while embroidered patches can work well on softer surfaces. See “Types of Materials Used for Patches” for more insights.
Q: How long does it take for patches to fully adhere after application?
A: The adhesive’s final bonding time can vary but generally takes about 24 hours to cure completely. Follow the product instructions for optimal results. More on this can be found in our section on “Troubleshooting Common Patch Problems.”
Q: Can I remove patches without damaging my backpack?
A: Yes, patches can often be removed by carefully peeling them off or using a seam ripper. If heat-activated, applying heat may help release the adhesive. Check our “Troubleshooting Common Patch Problems” for additional removal techniques.
Q: Is it safe to wash a backpack with patches?
A: Most patches can withstand washing, but it’s important to follow care instructions and wash on a gentle cycle. It’s recommended to spot clean when possible to prolong the lifespan of both patches and backpack. See “Caring for Your Patches and Backpack” for further details.
Key Takeaways
Thanks for watching “How to Stick Patches on Backpacks: Pro Tips for Perfect Results”! Remember, choosing the right adhesive and properly prepping your patches can make all the difference in ensuring they stay secure. Don’t hesitate-get started on personalizing your backpack today! If you have any questions or need further tips, drop a comment below-we’d love to hear from you!
For more great content, check out our guides on “Choosing the Perfect Backpack” and “How to Care for Your Outdoor Gear” to enhance your adventurous spirit. Don’t forget to subscribe to our newsletter for exclusive insights and updates on the best tools and maintenance techniques! Keep exploring and making your gear uniquely yours!