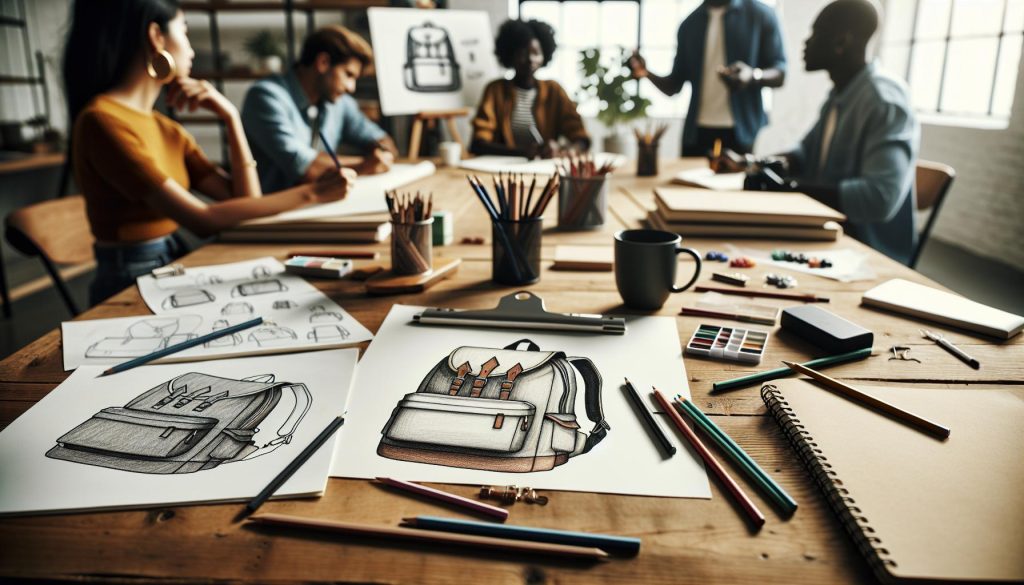
Whether you’re an aspiring artist or simply looking to enhance your sketching skills, learning how to draw a backpack can be a fun and rewarding experience. Backpacks are not only essential gear for students and adventurers alike, but they also offer a unique blend of shapes and textures that can challenge even seasoned artists. This step-by-step guide will help you break down the complexities of drawing a backpack into manageable parts, allowing you to create a realistic representation with ease. By understanding the basic forms and proportions, you’ll build confidence in your drawing abilities while exploring your creative potential. Get ready to unleash your artistic flair as we embark on this visual journey together!
Understanding Backpack Anatomy: Key Features to Include

Understanding how a backpack is constructed enhances your ability to draw it accurately and creatively. A well-designed backpack combines functionality with aesthetic appeal, making it a unique subject for artists. Key features to include when sketching a backpack are its shape, compartments, straps, materials, and additional accessories.
The overall silhouette of the backpack can vary significantly, whether it’s a sleek, urban style or a rugged, outdoor design. Typically, a traditional backpack has a rectangular body, but don’t hesitate to experiment with rounded shapes for a softer look. Pay attention to the front panel, which often features organization pockets, zippers, or buckles that add texture and detail to your drawing.
Straps are not merely functional; they also contribute to the overall visual impact of the backpack. Wide, padded straps suggest comfort and load-bearing capability, while thinner straps can convey a lighter, more casual feel. Make sure to illustrate how the straps connect to the main body of the backpack and how they might arch or flop when not in use, adding a dynamic quality to your drawing. Don’t forget about the top handle, which is common on most backpacks, as it can provide a focal point in your artwork.
Finally, incorporating materials like canvas, leather, or nylon can enhance the realism of your drawing. Each material has its own texture: canvas can appear more rugged, while leather may shine under light. Consider adding stitching details and brand logos to give your backpack character. By focusing on these key features, you’ll be able to create a detailed and captivating backpack illustration that reflects both form and function.
Essential Tools for Drawing a Backpack
To create stunning backpack illustrations, having the right tools at your disposal is crucial. Whether you’re a seasoned artist or just starting out, the can make a significant difference in the quality and effectiveness of your artwork. A well-equipped artist’s toolkit not only boosts creativity but also enhances precision and efficiency in capturing the intricate details of a backpack.
Start your artistic journey with high-quality drawing materials. Pencils are indispensable; opt for a range of graphite grades, from soft (B) to hard (H), allowing you to create varied line thickness and shading. For outlines and intricate designs, consider fine tip pens or technical drawing pens that provide consistency and clarity. When it comes to coloring, colored pencils or markers can add vibrancy to your drawings. Look for brands that blend well and offer a wide spectrum of colors. If working digitally, ensure you have a reliable drawing tablet and stylus, as software options like Adobe Illustrator or Procreate provide flexibility to experiment with colors and textures.
Additional Accessories
Complement your main tools with a few accessories that can elevate your drawing game:
- Erasers: Invest in both kneaded and precision erasers for correcting minor mistakes without damaging your paper.
- Ruler or Straightedge: For achieving sharp, clean lines when depicting the structure of your backpack.
- Blending Tools: Stumps or tortillons can help in blending pencil marks for a smooth finish, particularly for shading purposes.
- Sketchbook: Use a sketchbook that accommodates your chosen medium, ideally with a heavier paper weight that prevents bleed-through.
Lastly, keep inspiration handy. Having a selection of reference images of different backpack styles allows you to observe various shapes, colors, and designs that can inform your artwork. Whether you choose to draw backpacks in a realistic style or with a more illustrative approach, gathering these tools and resources will empower your creative process and help you bring your backpack sketches to life.
Step-by-Step Guide to Sketching a Basic Backpack

To bring a backpack to life on paper, start with a solid foundation by sketching its basic shape. Imagine a rectangular form for the body, with a curved top that gives it a three-dimensional look. Begin by lightly drawing a vertical rectangle, which will form the main compartment of the backpack. The height can vary depending on your design – you might prefer a taller, slender backpack for a sleek look or a shorter, wider one for a bulkier appearance.
Once the main body is outlined, add the curved top by sketching a semicircle or a dome shape at the top of the rectangle. This gives the backpack its characteristic rounded appearance, reminiscent of traditional designs. From this shape, draw two symmetrical lines extending down from the sides of the dome, blending them into the rectangle’s edges. These lines will help to shape the straps later.
Next, consider the pockets and details that make your backpack unique. Most backpacks include front pockets for easy access to essentials, so sketch a smaller rectangle or oval shape on the front. You can also add side pockets by drawing two vertical shapes at the sides of the backpack. As you refine your design, indicate where these pockets will be by lightly tracing their contours. Don’t forget the flap that often covers these pockets, which can be created by adding an additional shape that extends over the front.
Finally, details such as zippers, straps, and buckles enhance realism. For zippers, draw thin parallel lines along the openings of the pockets. To add straps, draw two elongated shapes starting from the top of the backpack, curving them into a “V” shape as they extend toward the bottom. Accessorize your design with circular or rectangular shapes for buckles where the straps connect, ensuring they match the style of your backpack. Once satisfied with the outline, go over your pencil lines with a finer pen to create bolder edges and erase the initial sketch marks for a clean finish.
Adding Depth: Techniques for Realistic Backpack Features
To elevate your backpack drawing from flat to dynamic, incorporating depth is essential. By using techniques that simulate three-dimensional space, your backpack will appear more realistic and engaging. Start by considering how light interacts with the shapes you’ve drawn. Shadows are your best friend in creating depth; they emphasize curves and the structure of the backpack. Use a range of pencil pressures to depict shadows: lighter for softer areas and darker for defined shapes. Pay special attention to where the straps connect to the bag, as these points often create shadows.
Curved lines can also enhance the illusion of depth. When sketching the backpack’s front pockets or flap, employ slightly curved lines rather than straight ones. This subtle alteration conveys the letting of fabric and adds to the overall shape’s believability. In addition, using overlapping elements, such as a front pocket positioned partially over the main compartment, helps to establish layers within your drawing. This approach gives the audience a clearer understanding of the object’s dimensionality.
Another effective method is to incorporate highlights using an eraser or a lighter pencil. By adding small, bright spots on the edges of curves, you simulate light reflecting off a slightly glossy surface. This will help differentiate parts of the backpack, like straps or zippers, making your drawing pop. To make these details stand out even more, consider varying the textures-smooth for the bag fabric, coarse for the straps-to guide the viewer’s eye across the different components of your design.
Lastly, think about the background or the context in which the backpack sits. Adding elements such as floor lines or shading beneath the bag can ground it in space, reinforcing the depth you’ve created. By paying attention to light, shadow, and texture, your backpack drawing will transform into a lively representation that captures the viewer’s attention and enhances their appreciation of your artistic ability.
Coloring Your Backpack Drawing: Tips for Vibrant Results

Color can transform a simple backpack drawing into a vibrant piece of art that catches the eye. Choosing the right colors is essential to convey the material and style of the backpack effectively. Start by selecting a color palette that reflects your backpack’s intended mood-whether it’s bright and playful or muted and sophisticated. For instance, a whimsical backpack might benefit from bold, primary colors, while one designed for outdoor activities could look more authentic in earthy tones.
When applying color, consider using different techniques to enhance the three-dimensional effect established in earlier drawing stages. Blending can deepen the effect; using colored pencils or markers, apply a base color and then layer on darker hues to represent shadows and lighter colors where light would naturally reflect. This method not only adds depth but also makes the backpack appear more realistic. Another useful approach is to incorporate patterns or textures, which can replicate the appearance of materials like canvas or leather. You might combine solid colors with stripes, polka dots, or even a floral design to give your drawing character and a personal touch.
As you work on coloring, think strategically about the areas that will receive the most light. These highlights can be achieved by leaving certain sections uncolored or applying a lighter shade over your base color, creating the illusion of a shiny surface. Also, don’t shy away from experimenting with different tools. Markers often provide bold, uniform color but can sometimes lack subtlety compared to colored pencils, which allow for more control and blending capabilities.
Lastly, framing your backpack with a complementary background can make your colors pop. Using softer, muted colors behind the backpack will keep the focus on your drawing while adding depth to the overall composition. Remember, the goal is to create a cohesive and engaging picture that showcases your backpack not just as a functional item but as a unique piece of art that reflects your style and creativity.
How to Personalize Your Backpack Design

When it comes to making your backpack design truly your own, personalization is key. A customized backpack isn’t just a statement of style but also a reflection of your personality and interests. Whether you’re an artist looking to express your creativity or simply want to differentiate your gear from others, there are countless ways to add your unique touch to a backpack drawing.
Consider incorporating personal symbols or motifs that resonate with you, such as favorite animals, quotes, or abstract shapes. Creating a design inspired by your hobbies, like musical notes for a musician or sports equipment for an athlete, can also add significance to your illustration. You could start by sketching various designs and patterns that evoke emotions or memories, then refine these elements into your backpack art.
Another exciting way to personalize your backpack drawing is through the use of vibrant colors and patterns. Experiment with different color schemes that speak to your personality-bold, bright colors can convey energy and fun, while softer pastels may reflect calmness and tranquility. You might also consider mixing textures, like stripes or polka dots, to add visual interest. Don’t hesitate to layer colors or integrate contrasting tones that can emphasize certain features of your backpack, such as pockets or straps, giving depth to your design.
Lastly, adding unique elements like badges, patches, or custom zipper pulls can make your backpack drawing stand out. Illustrating these accessories can give your backpack a more lived-in, adventurous vibe, suggesting stories or places the bag has been. Incorporating such details not only showcases your artistry but also enhances the storytelling aspect of your drawing, making it more than just an image-it’s a representation of your journey, values, and experiences.
By infusing your artwork with personal touches, you’ll create not just a drawing of a backpack but a piece that resonates deeply with who you are, captivating anyone who views it.
Common Mistakes When Drawing Backpacks and How to Avoid Them
One of the most common pitfalls artists face when drawing backpacks is neglecting the proportions and perspective. It’s easy to get carried away with details like zippers and patches, but if the overall shape is off, it will detract from the realism of your drawing. Start by sketching light outlines to establish the correct proportions. Use basic shapes, like rectangles and ovals, to represent the main body and compartments of the backpack. Observing real-life backpacks or reference images can greatly help in understanding the correct perspective.
Another frequent mistake is misunderstanding the anatomical structure of a backpack. Each component-straps, pockets, and zippers-has a specific relationship to the main body. Failing to accurately connect these elements can make your drawing look disjointed. Pay close attention to how straps attach to the body and maintain clarity on where each pocket sits. Creating a small checklist of key features can assist you in verifying that no essential components are missing or misplaced.
Lighting and shading are also often overlooked by beginners. To add depth and dimension to your backpack drawing, ensure that you incorporate shadows depending on the light source. This means that areas not exposed to light, like the underside of flaps or beneath straps, should be darker. A common error is using flat colors without variation, which can make your drawing appear static. Gradually blending your shades or employing cross-hatching can create more dynamic textures.
Finally, rushing through the coloring phase can lead to unintentional mistakes. Rather than applying a single color uniformly, consider layering various shades to capture highlights and shadows effectively. Experiment with different coloring techniques to see what brings your backpack to life while avoiding a lifeless palette. Patience in this stage will reflect the time and effort you’ve put into mastering backpack drawing, bringing out the vibrancy and character of your design.
Inspiration: Famous Backpack Designs for Artists
The world of backpacks is rich with designs that blend function and style, making them not just practical but also artistic inspirations. Famous backpack designs can spark creativity in your own art, showcasing how form, color, and texture can come together to express personality and purpose. For artists, drawing these iconic bags can be a great way to practice intricacies like shapes, shading, and embellishments, giving you valuable insight into balancing aesthetics and functionality.
One notable example is the Herschel Little America Backpack, which combines a classic mountaineering style with modern functionality. Its unique blend of materials-from durable fabric to leather accents-creates a striking visual contrast that artists can explore in their sketches. Focus on how the flap closure, adjustable straps, and front pocket contribute to its character and how these elements can be interpreted in your art.
Another influential design is the Fjällräven Kånken, recognized for its simplistic and vibrant aesthetics. This backpack’s boxy shape and range of colors present an exciting opportunity to play with flat versus dimensional techniques in your drawings. The Kånken’s large, easy-to-access front pocket and minimalistic design can challenge artists to convey a sense of depth without overwhelming detail. Use it as an example of how color choices can evoke different moods in your artwork.
Additionally, the North Face Recon Backpack, celebrated for its functionality and rugged design, is perfect for understanding the interplay between utility and artistry. Its multiple compartments and ergonomic fit can inspire a detailed analysis of the bag’s structure in your sketches. Pay attention to how features like compression straps and mesh pockets not only serve practical purposes but also add complexities in terms of outline and shadow when drawing.
Exploring these prominent backpack designs enables artists to not only improve their technical skills but also to create personalized illustrations that reflect their unique styles. As you gather inspiration from these iconic backpacks, consider how you might incorporate elements from your favorite designs into new creations, fostering a deeper connection to your art and the everyday items we rely on.
Advanced Techniques: Shading and Texturing Your Drawing
When it comes to drawing a backpack, mastering shading and texturing can transform a basic sketch into a lifelike representation. Shading not only adds volume but also emphasizes the contours and design features of your backpack. Think about how light interacts with surfaces; the subtle gradients and contrasts play a vital role in conveying depth and realism.
To begin, consider the light source in your drawing. Is it coming from the left, right, above, or below? This will help you determine where shadows and highlights should fall. Use a soft pencil or charcoal for initial shading to create a smooth transition from light to dark. Start by lightly sketching the overall shape of your backpack, then build up layers of shading. For materials like fabric or leather, varying pressure with your pencil can mimic the texture; apply gentle pressure for lighter areas and more pressure for darker sections.
Additionally, you can employ techniques such as cross-hatching to create texture. This involves drawing intersecting lines in areas of shadow to add complexity and depth. Consider the materials that different backpacks are made from-such as canvas, nylon, or leather-each having its own unique texture. For instance, a backpack made from canvas may require a smoother shading approach, while one made from leather may benefit from sharper contrasts to indicate its shininess.
Moreover, using an eraser creatively can enhance your work. By lightly erasing certain areas, you can pull out highlights that emulate the sheen of a material. This technique can be particularly effective around zippers or buckles, where reflections are often pronounced.
When drawing straps or pockets, pay attention to the details; folds and creases can be highlighted by directional strokes that follow the shape of the material. This meticulous approach to shading and texturing not only enriches your overall drawing but also helps you reflect the unique characteristics of each backpack style you may choose to illustrate. By mastering these advanced techniques, you elevate your drawings from mere illustrations to captivating artworks that resonate with observers.
Using Digital Tools to Draw Backpacks
Digital tools have revolutionized the way artists create, offering endless possibilities for drawing backpacks with precision and creativity. Whether you’re using a stylus on a tablet or drafting with graphic design software, digital platforms provide a unique blend of traditional artistry and modern technology. One of the most significant advantages is the ability to easily manipulate your work-making adjustments, experimenting with colors, and layering textures without the fear of permanent mistakes.
To start, choose software that suits your style and skill level. Programs like Adobe Illustrator and Procreate are excellent options for their versatility and user-friendly interfaces. Utilize layers to separate different elements of your backpack design, allowing you to adjust, hide, or edit each aspect independently. This feature provides control over shadows, highlights, and textures, enabling you to experiment freely without compromising the overall design. Furthermore, using a grid or guideline can help maintain proportions and symmetry, especially useful for achieving a balanced aesthetic.
Coloring in a digital format can enhance vibrancy and depth, making your backpack designs pop. You can easily alter colors or gradients, offering an opportunity to see various color schemes instantly. Consider making use of digital brushes that mimic textures-such as fabric surfaces or metallic accents-which can add realism to your drawing. Don’t hesitate to explore blending modes that allow different layers to interact creatively; for example, a multiply blending mode can enhance shadow depth, while screen mode can brighten areas for highlights.
Lastly, digital tools also enable you to access vast online resources for inspiration and tutorials. Platforms like YouTube and art forums can provide techniques specific to backpack drawing, from basic forms to advanced shading methods. Engage with the digital art community to seek feedback on your work, which can lead to improvements and new ideas. By mastering digital art tools, you not only streamline your backpack drawing process but also expand your artistic possibilities, crafting unique designs that showcase your individual style.
Exploring Backpack Styles: From Classic to Modern
The evolution of backpack styles showcases not only changes in trends but also advancements in functionality that cater to diverse lifestyles. From the classic, utilitarian designs that have withstood the test of time to the modern, trend-driven iterations seen today, each style offers unique features suited for various activities. A well-drawn backpack not only captures its physical essence but also reflects its historical context and intended use.
Classic backpacks typically exhibit a simple, functional silhouette, designed primarily for durability and comfort. Features often include canvas or leather materials with minimalistic aesthetics, just like early school backpacks or hiking packs. Many artists choose to emphasize these straightforward shapes and sturdy materials in their sketches, showcasing elements like robust stitching and simple closures. When drawing, focus on accurately depicting the proportions and the balance between utility and style, ensuring that the historical roots of these designs shine through.
In contrast, modern backpacks often incorporate bright colors, unconventional shapes, and advanced materials such as nylon or polyester. They might feature complex design elements, including multiple compartments, ergonomic straps, and tech-friendly components, such as built-in charging ports. When illustrating these styles, it’s important to pay attention to these details, as they significantly enhance realism. Utilize vibrant color palettes to emphasize material contrasts and modern embellishments, allowing your artwork to breathe with contemporary flair.
To create a balance in your drawings, consider using visual references that highlight both classic and modern styles. Mixing these elements can lead to creative designs that resonate with various audiences, from outdoor enthusiasts to everyday urban users. Including details such as adjustable straps, side pockets, or even stylish accessories can further enrich your backpack illustrations. By conveying both the historical significance and current trends in your artwork, you empower your audience to appreciate the diversity in backpack designs, making for a compelling artistic expression.
Ultimately, whether you’re sketching a rugged outdoor backpack or a sleek urban pack, understanding the distinct styles and their evolution can add depth to your artwork. Embrace these differences in your drawings and let the backpacks tell their stories through your illustrations.
Showcase Your Artwork: Tips for Displaying Backpack Drawings
When it comes to displaying your backpack drawings, presentation is as crucial as the artwork itself. A well-displayed piece can draw attention and highlight your skill and creativity, making your artwork memorable. Consider these effective strategies to showcase your drawings, whether for an exhibition, online portfolio, or social media.
Choose the Right Display Method
The medium you use to display your artwork can greatly affect its impact. For physical displays, consider using high-quality frames that complement your backpack art. A simple, elegant frame can add sophistication and draw focus to your drawing. If you’re showcasing your artwork in an online format, ensure to take high-resolution photographs with proper lighting to capture the details of your work. Avoid harsh shadows and reflections; natural light works wonders for authenticity.
Engage with Your Audience
When displaying your artwork, think about how to engage viewers. Consider placing informational tags beside your artwork that explain your inspiration, process, or the techniques used. This not only enhances the viewer’s understanding but also personalizes your connection with them. Additionally, engaging with your audience during an exhibition or on social media can foster meaningful discussions about your techniques and concepts, encouraging feedback and community interaction.
Create a Consistent Theme
For a cohesive presentation, aim for consistency in how you display your backpack drawings. If you’re showcasing multiple pieces, consider arranging them by style, color scheme, or theme. This approach creates a narrative within your display and helps viewers see the evolution of your skills or the diverse approaches you take in your artistry. For online displays, consistency in graphic design such as fonts, colors, and layout can create a professional appearance that aligns with your personal brand.
- Lighting: Use soft, diffused light to enhance colors.
- Positioning: Eye-level positioning engages viewers better.
- Interactive Elements: For physical displays, consider adding interactive components, such as showcasing the sketches that led to the final piece.
By carefully choosing how you display your backpack drawings, you can showcase not just your artwork, but also tell a compelling story that resonates with your audience and elevates your artistic expression.
Faq
Q: How can I make my backpack drawing look more realistic?
A: To enhance realism in your backpack drawing, incorporate details such as shadows and highlights to add depth. Use shading techniques learned in the section on “Adding Depth: Techniques for Realistic Backpack Features” to make the fabric appear textured and three-dimensional.
Q: What materials are best for drawing a backpack?
A: For drawing a backpack, use high-quality pencils for sketching and fine liners for outlining. Colored pencils or markers are great for coloring. Refer to the “Essential Tools for Drawing a Backpack” section for specific recommendations on tools that can enhance your artwork.
Q: What common mistakes should I avoid when drawing a backpack?
A: Common mistakes include neglecting proportions and skipping details like zippers and straps. Ensure you follow the tips in “Common Mistakes When Drawing Backpacks and How to Avoid Them” to capture the backpack’s key features correctly.
Q: How do I choose a backpack style to draw?
A: Select a backpack style based on personal interest or trends in fashion. The “Exploring Backpack Styles: From Classic to Modern” section provides insights into various backpack designs that can inspire your drawing.
Q: What are some digital tools I can use to draw a backpack?
A: Digital tools like Adobe Illustrator or Procreate are excellent for backpack drawing. They offer flexibility in color and texture. Check the “Using Digital Tools to Draw Backpacks” section for tips on how to maximize these tools for your artwork.
Q: How can I customize my backpack design in my drawing?
A: Customize your drawing by adding personal elements such as patches, badges, or patterns that reflect your style. The section on “How to Personalize Your Backpack Design” details various methods to make your backpack unique in your artwork.
Q: What techniques can I use for shading my backpack drawing?
A: Techniques like cross-hatching and stippling can significantly enhance shading in your backpack drawing. Explore “Advanced Techniques: Shading and Texturing Your Drawing” for practical shading methods that impart realism.
Q: How can I display my backpack drawing?
A: To display your backpack artwork, frame it or create a digital portfolio online. The “Showcase Your Artwork: Tips for Displaying Backpack Drawings” section offers additional ideas to effectively present your creations.
The Way Forward
You’ve now mastered how to draw a backpack, and we hope you feel inspired to create your own unique designs. Remember, practice makes perfect, so don’t hesitate to revisit these steps as you refine your artistic skills. If you enjoyed this guide, check out our related tutorials on how to draw everyday items, such as Swiss Army knives and pocket knives, to further enhance your drawing repertoire.
Ready to take your art journey further? Subscribe to our newsletter for tips, resources, and exclusive content delivered straight to your inbox. And if you have any questions or want to share your creations, drop a comment below-we love hearing from our artistic community! Keep exploring and drawing; the possibilities are endless!